
RODECaster Pro and RODE PodMic - Best Beginner Podcast Set-up

Podcasting has gained massive popularity in the last few years. In the video above, Nick takes a look at some new products that make it super simple to get up and running with any podcast idea.

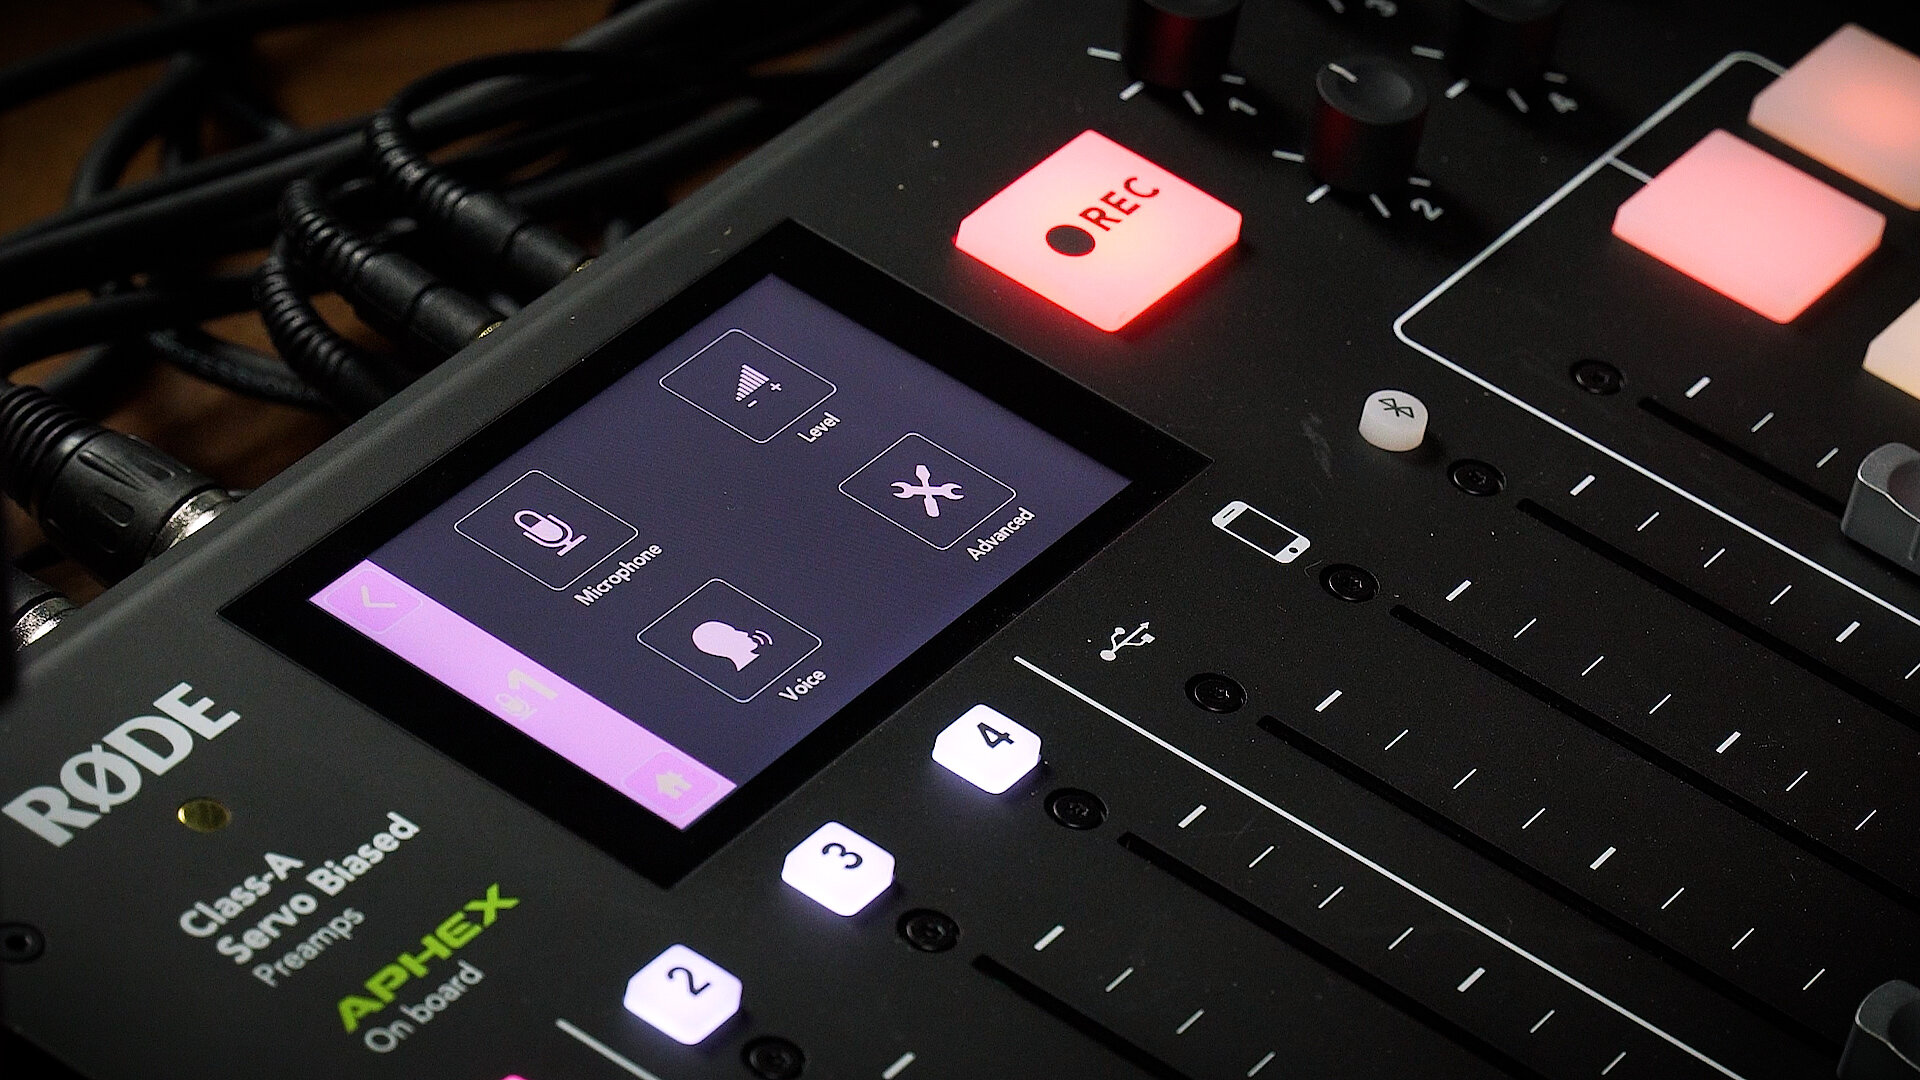
RODEcaster Pro interface panel
The RODECaster Pro is an all-in-one podcasting interface that has four inputs, four outputs, and is used in conjunction with the brand new PodMic. The setup is user-friendly: all it takes is plugging in the microphone, selecting some presets, adjusting a few parameters, and voila! The result is a professional sounding podcast from day one.
In addition to the RODEcaster Pro, Nick utilizes a couple items from Tascam, including the TH-MX 2s (great budget headphones) that will facilitate any podcast production studio. Other tools needed are XLR cables, as well as a way to mount the mics.
The RodeCaster Pro is the brain of the operation - everything is done behind the scenes with this setup, making any podcast sound amazing, without needing in-depth knowledge of audio engineering.

RODEcaster Pro - Interface panel with 4 faders
The interface itself has four faders that correspond with four XLR mic inputs. There is a touch-screen for navigation through all menus and settings such as turning on and off processing, and easy access to different features that are built into this device.
There are also faders for a USB audio port, an auxiliary input jack, and Bluetooth input. There are eight sound banks, which can be pre-programed with musical intros and outros, as well as sound effects. There are also four independent volume controls for the four headphone jacks.

Back panel of RODEcaster Pro
As shown in the video, there is a large record button. On the back, there is a power switch, a power connector, a USBC, a micro SD card slot for immediate recording, left and right monitor outputs for headphone jacks, a 3.5 millimeter headphone jack for connecting a phone or other audio device, and four XLR inputs for four mic channels.
The build quality is very sturdy and small enough that it can fit anywhere and is extremely portable. Regarding audio input, this unit has phantom power, meaning it can power any microphone.
The next crucial component of this podcasting setup is the microphones. The setup featured in this video utilizes four pod mics, which are dynamic microphones from RODE that are specifically built for podcasting. The XLR jacks are in the back and everything is kept very simple.

Dynamic RODE Pod microphone
Once everything is plugged in, hit the red power button on the back and everything will boot up. Before recording, make sure that the microphone is programmed for the speaker’s voice. As shown in the video, the easiest way to make adjustments is to go into the menu for each microphone.
RODEcaster Pro - Channel 1 menu interface
In the “Channel 1” menu, click on “microphone.” Nick selects the profile for the RODE Podmic, as that’s the type of microphone utilized in this setup. Other microphones are supported, but if using a mic that isn’t supported, choose “generic condenser” and “dynamic microphone profiles.”
Next, go to “level.” This will show how hot the mic is. In this demonstration, the level is bouncing around 35, which is where it needs to be. Once the microphone levels are set, the user can tailor it to his or her voice. This can be done by clicking on the “voice” button. In “voice,” there is an option to go to tone. This can also be thought of as “pitch” - determine whether the person has a deep, medium, or high voice.

RODEcaster Pro - Voice Tone menu interface
After adjusting tone and levels, the next adjustment is “strength.” In here, choose whether the speaker has a quiet, medium, or strong volume voice. In order to compensate for a loud voice, in this profile, choose the middle-of-the-road medium.

RODEcaster Pro - Advanced menu interface
Finally, in “advanced,” some of the processing capabilities are built right into the RODECaster Pro, including the compressor, de-esser, high-pass filter, and noise gate. On the first channel, it also has the “ducking” feature. This will automatically lower some microphone volumes and allow the host microphone to cut through. This is helpful when there are a lot of people talking and a moderator needs to cut through the mix to move the conversation forward.
There's also an aural exciter, a big bottom, and an “on and off” switch for the overall processing. Essentially, the aural exciter adds a little presence to the voice, meaning it might sound a little bit crisper. The big bottom feature adds presence and equalization to the voice, giving more of a “radio announcer” sound. For people that aren't going to be bringing their recording into an audio editing software, utilizing this feature is a really nice way to get a great sounding podcast right out of the box.

Multiple microphones plugged into corresponding jacks
If there is more than one person in a podcast, it is crucial to go through each channel. These can be accessed in the menu, where channels one, two, three and four, are visible on the touchscreen. For every speaker, make sure their headphone levels are good for everyone. Plug your headphones into the quarter inch jacks on the back of the mixer. Each jack also has a corresponding number.
To keep things simple, match the number of microphone inputs to the number of headphone outputs Turn up or down the volume for each set of headphones to each speaker’s liking.
To record on the RODECaster Pro, make sure to use a microSD card. For reference, a 32GB card will allow over 30 hours of recording time.
There are some more advanced features, in which the user can utilize USB audio, so when plugged into a laptop or computer, he or she can bring in the audio from the computer via USB.

Advanced features USB Smartphone Bluetooth jacks
Another advanced feature is a 3.5 millimeter jack that can plug into any smartphone. The other option for using a smartphone is connecting to Bluetooth. To bring someone in over Bluetooth from a phone call, FaceTime call or Skype call, press the “Bluetooth” button on top of the fader. This will bring up the Bluetooth pairing menu - turn on “Bluetooth” and click “pair.” After clicking, it will ask to pair a smartphone, tablet, or computer. Next, put the Bluetooth volume up to “zero” or “unity.”
Finally, there is a sound bank. These are trigger pads that can trigger music or interview audio. Any audio file can be triggered by pressing one of these buttons. Go back to the meter screen, have each person talk a little bit to make sure they are hitting right around unity, which is the bold line on the display. If everything looks good for each channel, go ahead and hit the record button, and you're off to the races!
In order to listen back to the podcast after recording, go into the menu using the music note button. From here, hit the back button and there will be a button called “podcasts.” The most recent podcast recorded will be queued up and the user can listen back to what they just recorded.
Overall, the RODECaster Pro is a user-friendly setup for any person or group of people wanting to start their own podcast. The operating system allows for on-the-fly editing, for quick, out-the-door productions, as well as more advanced options for professionals wanting to spice up a broadcast. This system is the best of both worlds!