
Rodecaster Pro - Multi-Track Podcast Recording + Firmware Update Tutorial


RODEcaster Pro Advanced menu MicroSD Card and USB toggled on
For those wanting a bit more flexibility with their podcast post production, this video examines the advanced features of the RODECaster Pro, including the multitrack recording functions.
The first method examined in this video is multitrack recording on the RODECaster Pro. To enable multitrack recording to the internal SD card, go into the menu using the gear icon. From there, go to “hardware” and click on “advanced” and “multitrack.” In this menu, there's an option for a microSD card - make sure this is toggled “on.”
For the future step of recording to the computer, make sure that multitrack is turned on. For the USB connection as well, make sure to get a raw signal to use in post production. Next, turn on the “bypass audio processing” option. This will prevent the processing from being applied to the audio files and the user has maximum flexibility in post production.

RODEcaster Pro podcast recording as mutli-track
Turn up all microphones, hit record, and this podcast will be recorded as a multitrack session, meaning each individual input is getting its own WAV file. In this video demonstration, Nick has microphone one plugged into a Zoom H6 audio recorder, as well as microphones 2, 3, and 4. Tracks for USB, the auxiliary input, Bluetooth, and the sound banks are also turned on.
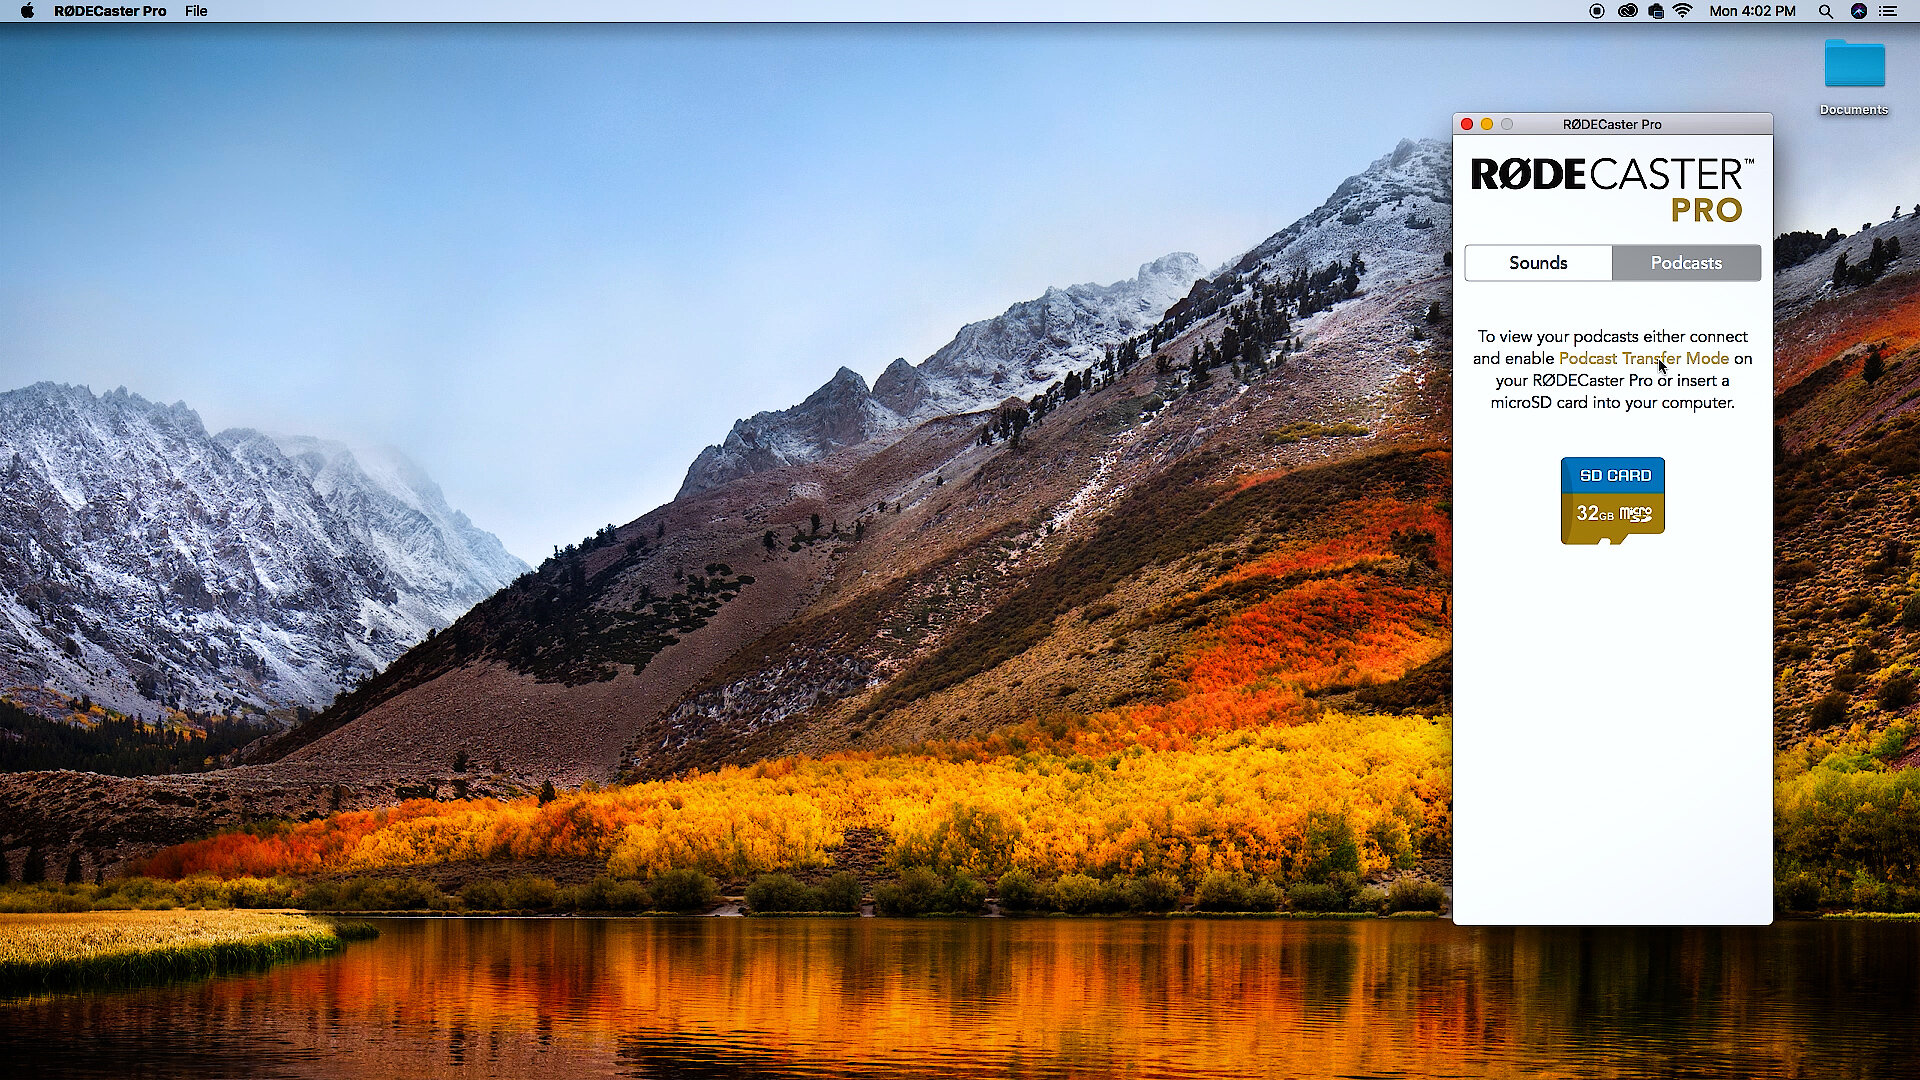
Podcast Transfer Mode in RODE Companion Application
After ending a recording, a user may want to pull the session up on his or her computer. Using the RODE Companion App, which is already installed, is a pretty simple process. After launching the application, a window will appear that shows the sound banks. For this particular example, the podcast transfer mode needs to be enabled on the RODECaster Pro before it shows up in this podcast menu.

Enable Podcast Transfer Mode in Micro SD menu
To enable the podcaster transfer, go to the gear icon, click “hardware,” then “microSD card” and the “enable podcast transfer mode” option will appear. After clicking “yes,” the user can now see all the podcasts showing up in the menu. For this demonstration, Nick goes with the most recent recording.
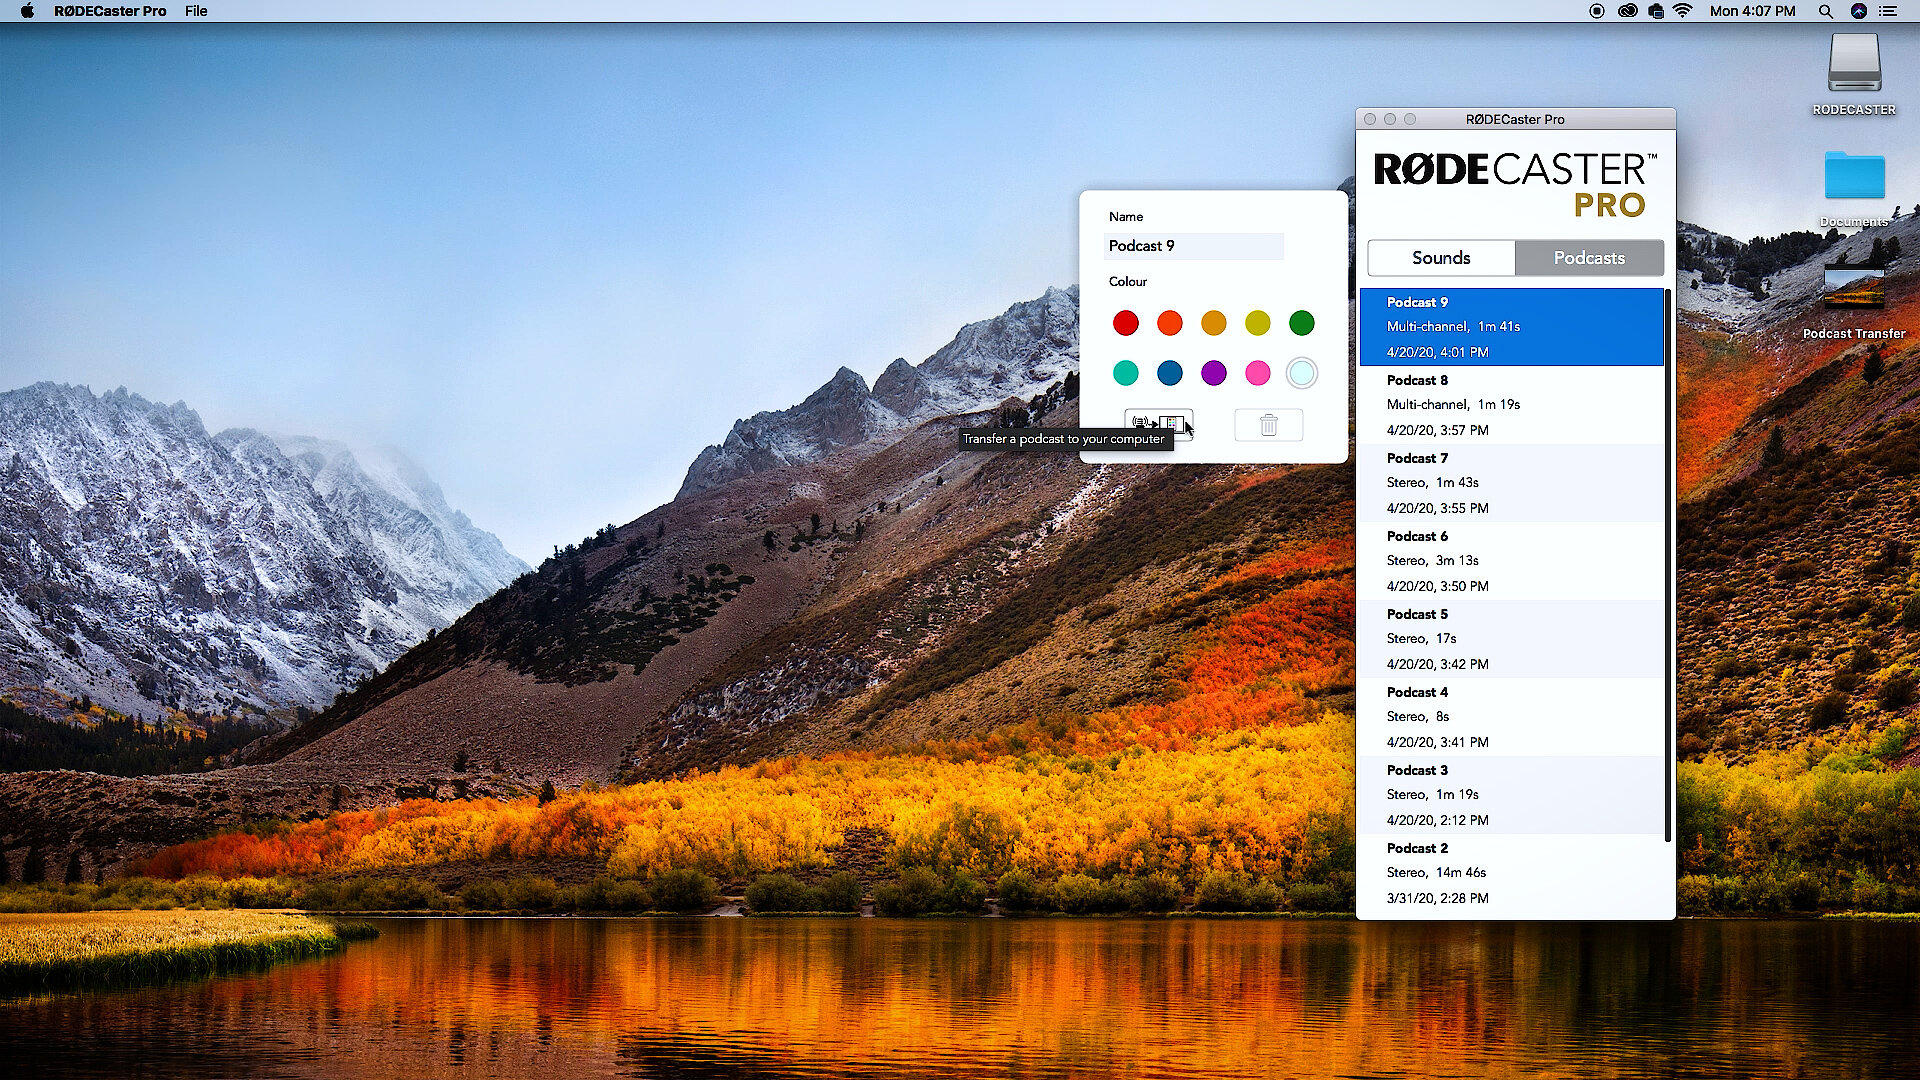
Transfer podcast to your computer
After transfering the selected podcast to the computer, create a new folder on the computer and make sure to have the new folder selected. After hitting “save now,” it will transfer all files to the computer. From here, there is the ability to edit the individual tracks in an audio program. In this video, Nick is using Adobe Audition, however any audio program is applicable.

Basic settings for multitrack podcast session
Once in Adobe Audition, use a sample rate of 48 hundred Hertz, a bit depth of 24 bits, and make sure the master send is stereo. Next, import the four microphone tracks. Once they’re imported, the easiest way to put these into the workspace is to select them all and drag them over. It will ask to add all selected files to the same track or onto its own track.

Import microphones into audio editing program

Drag microphone tracks into main panel
After dragging in the various audio files for microphones one, two, three, and four, the user can go crazy with adding effects, trimming voices, adjusting volumes, etc.

Drag microphone tracks into main pannel
For more in-depth explanations on audio capture and mastering, check out Clean Cut Audio.
Next, Nick runs through how to use the RODECaster Pro as a multitrack audio interface. On the RODECaster Pro, make sure the podcast transfer mode is done. Now, go to “advanced multitrack” and make sure that the USB setting for multitrack is turned on.

Check RODEcaster Pro Multichannel in preferences
On the computer, make a new multitrack session and hit “OK,” then go to “preferences,” “audio hardware,” and there is the default input. For this demonstration, use the “multichannel” option.
Make sure to set the default output to the RODECaster Pro stereo, as this means the user can monitor using headphones. On each track there is an in and out - what needs changed is the input. For the microphone inputs, choose “mono,” as well as whatever microphone the user is speaking into (in this video example, it is “microphone one”). If the sound meters are not showing up, make sure “arm” is enabled for recording.

Select mono for each microphone track
If there are multiple people speaking, simply move to another track, go to “input,” “mono,” and select each person’s microphone. Make sure “arm” is enabled for recording each track.
Now it’s time to record!
Hit the record button and it will start recording the session. When finished recording, simply hit “stop” on the DAW and the recorded tracks will appear.
Some new advanced features were just unlocked by a beta firmware released by RODE. On their website, go to “firmware” and select the RODECaster Pro Beta Version. Select either “PC” or “Mac” depending on the user’s computer. Once downloaded, simply unzip the file and install.
Open the new RODECaster Pro application and the new beta will alert that the firmware is out of date. This alert appears because the user is installing this beta. After updating, the RODECaster Pro will say beta up in the corner. Go to “settings,” “hardware,” “advanced” and now the “extras” option is visible.
The “extras'' option will enable “effects edit” mode as well as “console meters” mode. Once those are enabled, the user can go back to the home screen.
A cool new feature is the “effects editing” mode: originally there were limitations for setting the type of voice, the volume of the voice, and strength of the voice in order for the processing to compensate for different voice types.
With the “effects editing” mode, the user can edit individual parameters for all the different effects. In order to edit these parameters, go to the individual channels by hitting the channel numbers and notice that the voice option is now grayed out. Effects are in their own menu. Click on “effects” and notice all the different effects including a brand-new one called “reverb.”
To begin, take a look at the compressor. In “effects editing” mode, all the individual compressor parameters can be adjusted, including threshold, ratio, attack release, and make up game. The user can make adjustments to the compressor, as well as noise gate, which is usually a little aggressive out of the box. Being able to adjust the factory settings for features like noise gate is useful because it allows flexibility to manually tone this setting down.
In addition to the compressor, having access to edit the aural exciter is crucial because out of the box, it tends to create a little bit of tinniness to the voices and sounds a bit thin. By dialing it back and adding a bit of presence to a voice, without losing low-end, the sound is much fuller.
Finally, there is the high-pass filter. The new effect in this panel is reverb. Typically most podcasts are pretty dry, with little to no reverb. This new feature allows the user to adjust reverb, adding more style and flair to the typical podcast sound.
It’s important to note that there's an overall compressor, which applies to the stereo mixdown of the entire podcast.
The very last feature Nick demonstrates in the video is an advanced feature of the “podcast transfer mode.” In the RODECaster Pro menu, go to “hardware,” “microSD card,” and turn on the podcast transfer mode. After turning this feature on, go back to the RODECaster Pro Companion App and select “podcasts.”
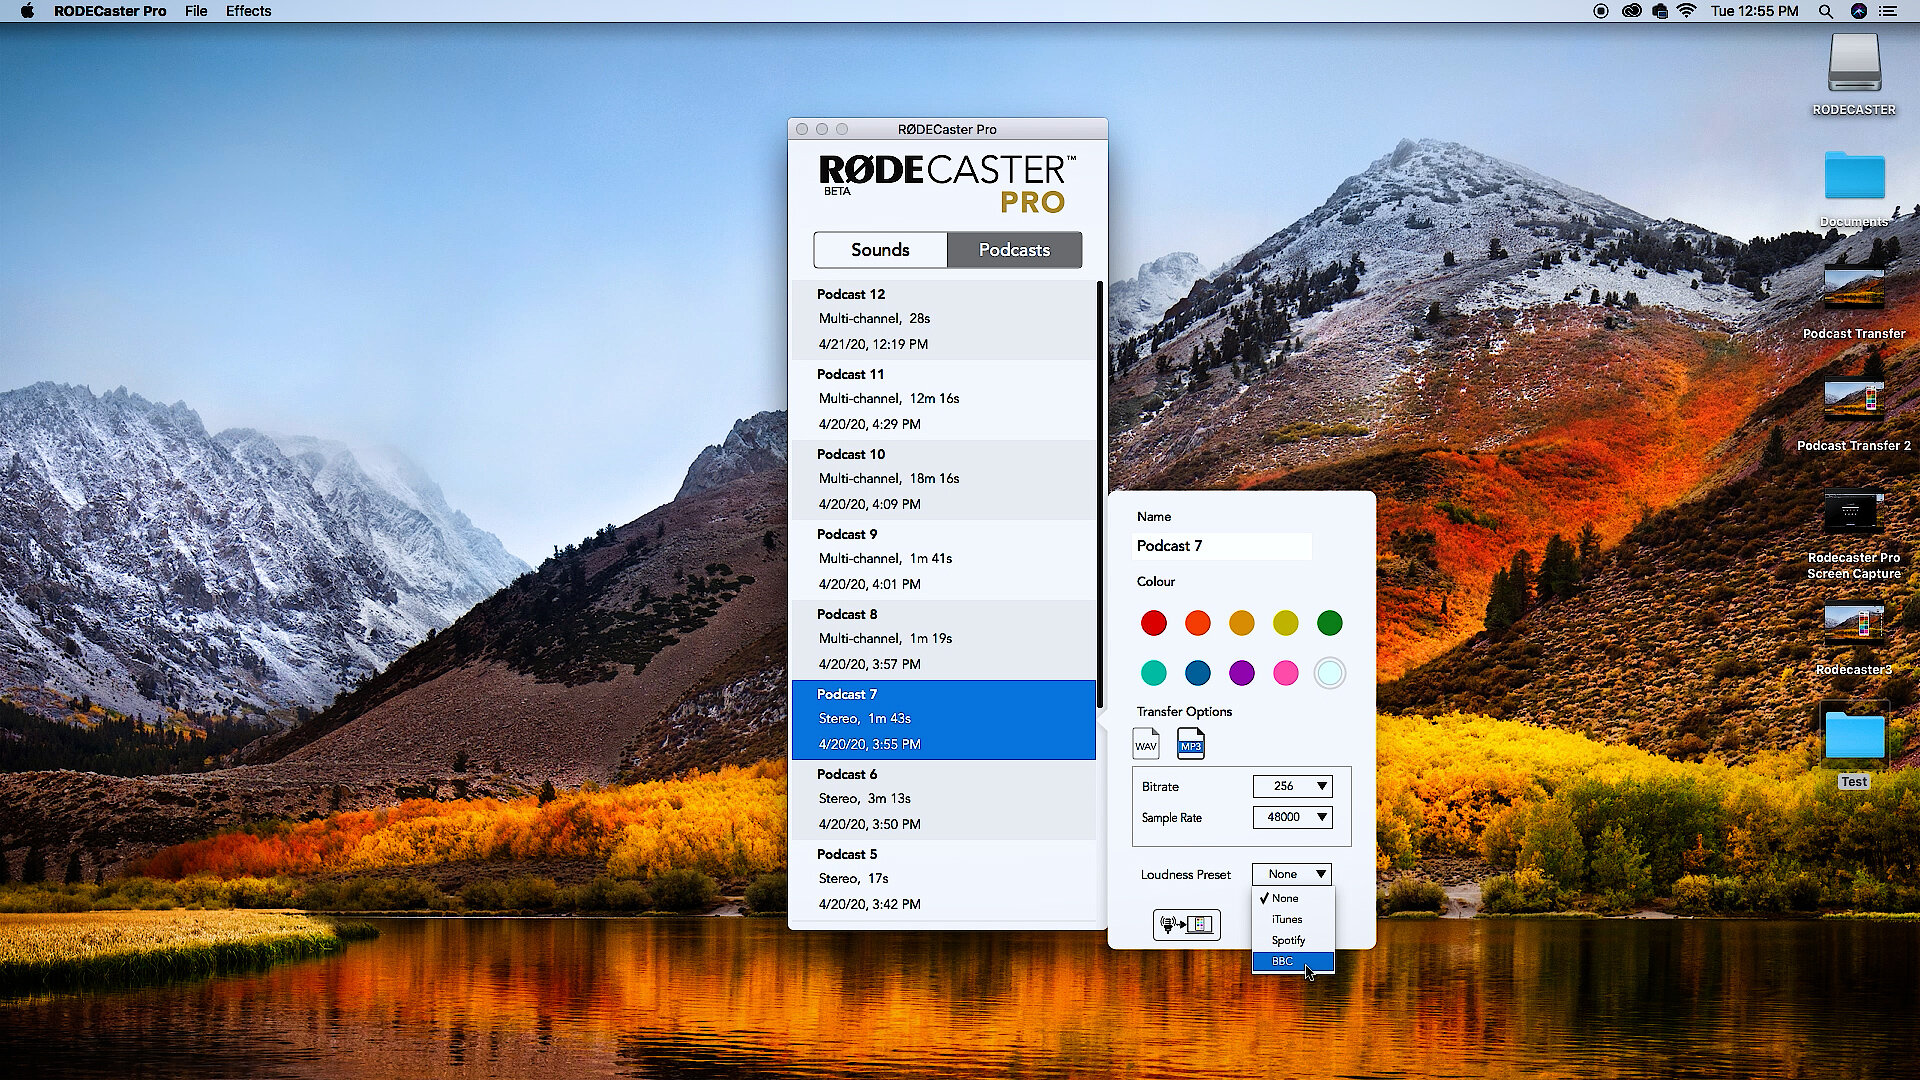
Export final podcast directly to a platform
This feature will show a couple new options for the podcast transfer mode, such as exporting directly to mp3. Next, choose the bitrate and sample rates, as well as a loudness presets including iTunes, Spotify, or BBC for the podcast export.
When all settings are locked in, simply click the “transfer podcast to your computer” button, and nothing else is required to syndicate the podcast. This is a very cool feature that streamlines the end process.
Overall, the RODECaster Pro is a user-friendly podcast setup that offers both simple recording features for a professional sounding podcast, as well as advanced options for those interested in creating a more stylized recording.
The options are endless and the end product will be music to the audience’s ears!