
$1000 Budget Video Editing PC Build Guide
Whether you’re a small content creator, freelance filmmaker, or an established production company, investing in a decent editing computer is a must. With the many options out there for various laptop and computer builds, the task of finding the perfect fit can be daunting. One way to get the most bang for your buck, while meeting your specific editing needs, is building your own PC.
Now let’s make it interesting by keeping the budget under $1000.
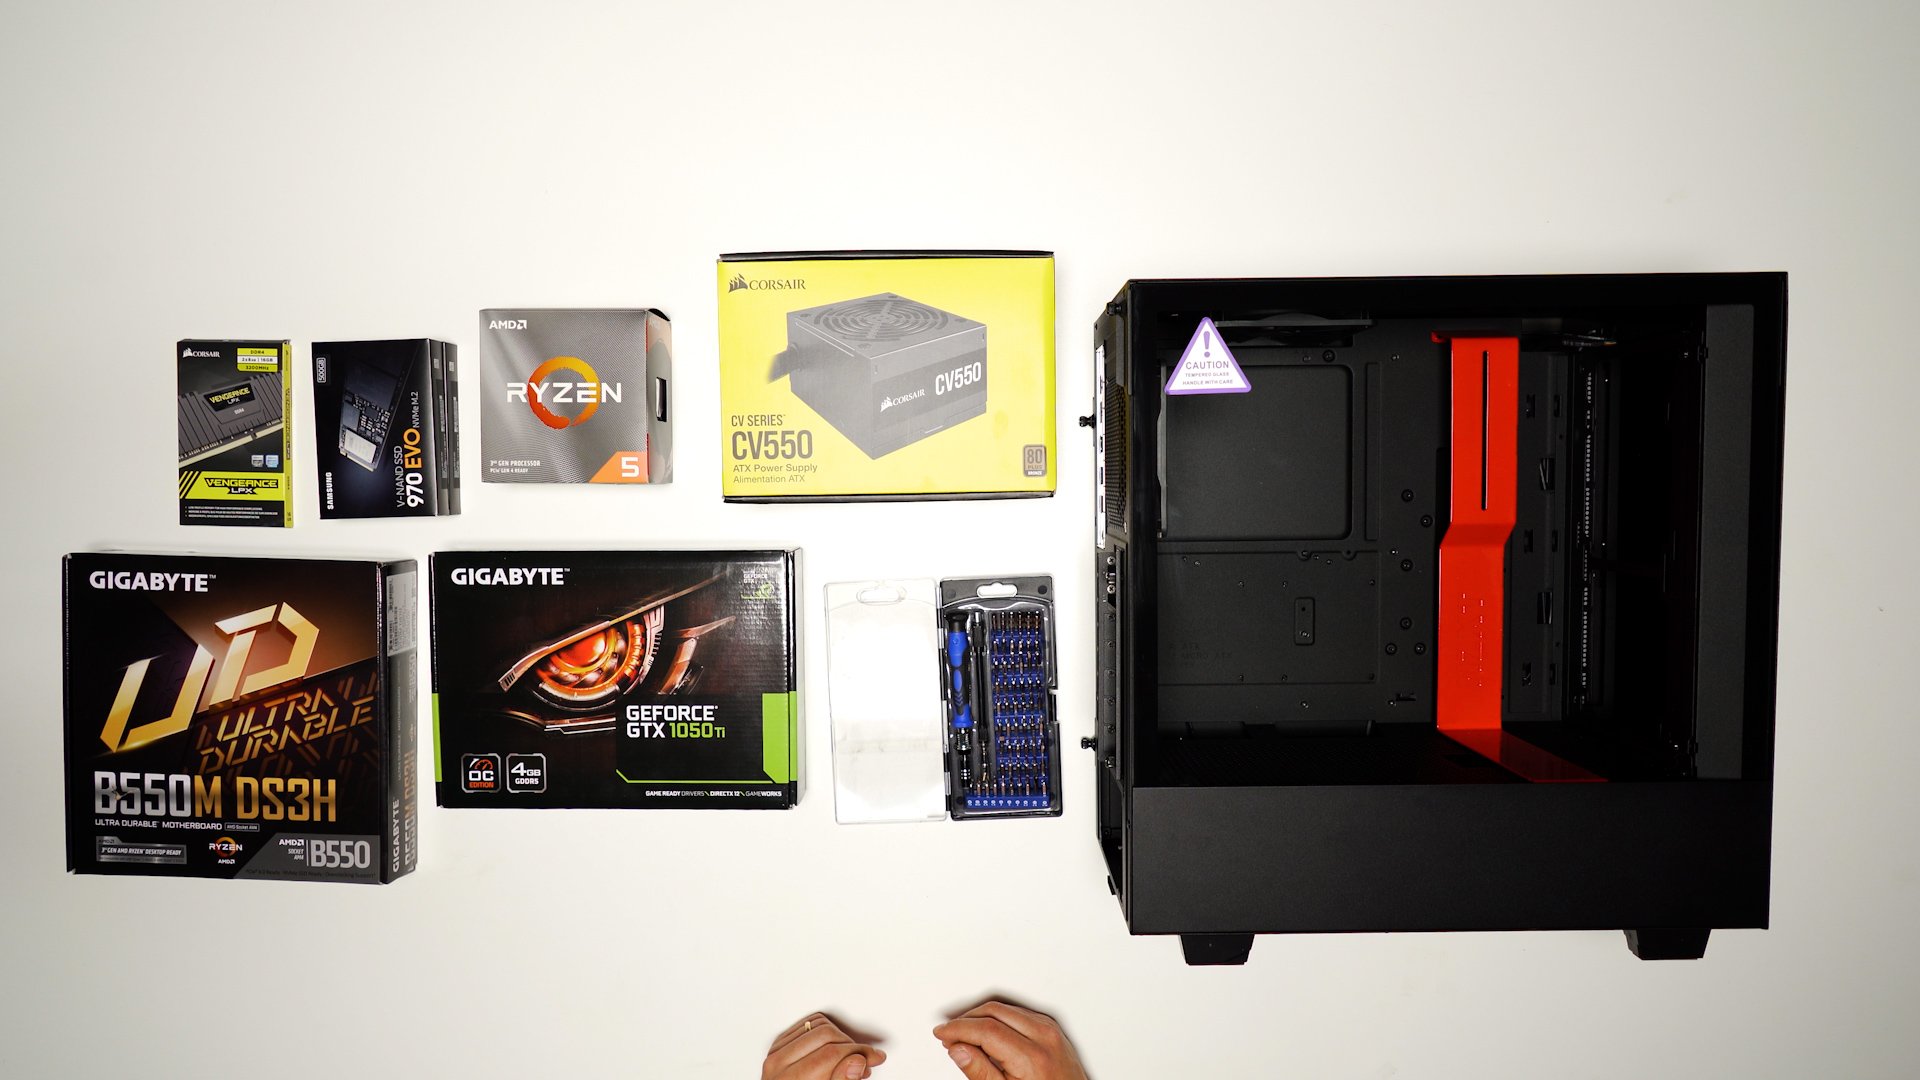
Before getting into the actual build, let’s go over all the different components for this computer, the prices paid, and why they were chosen.
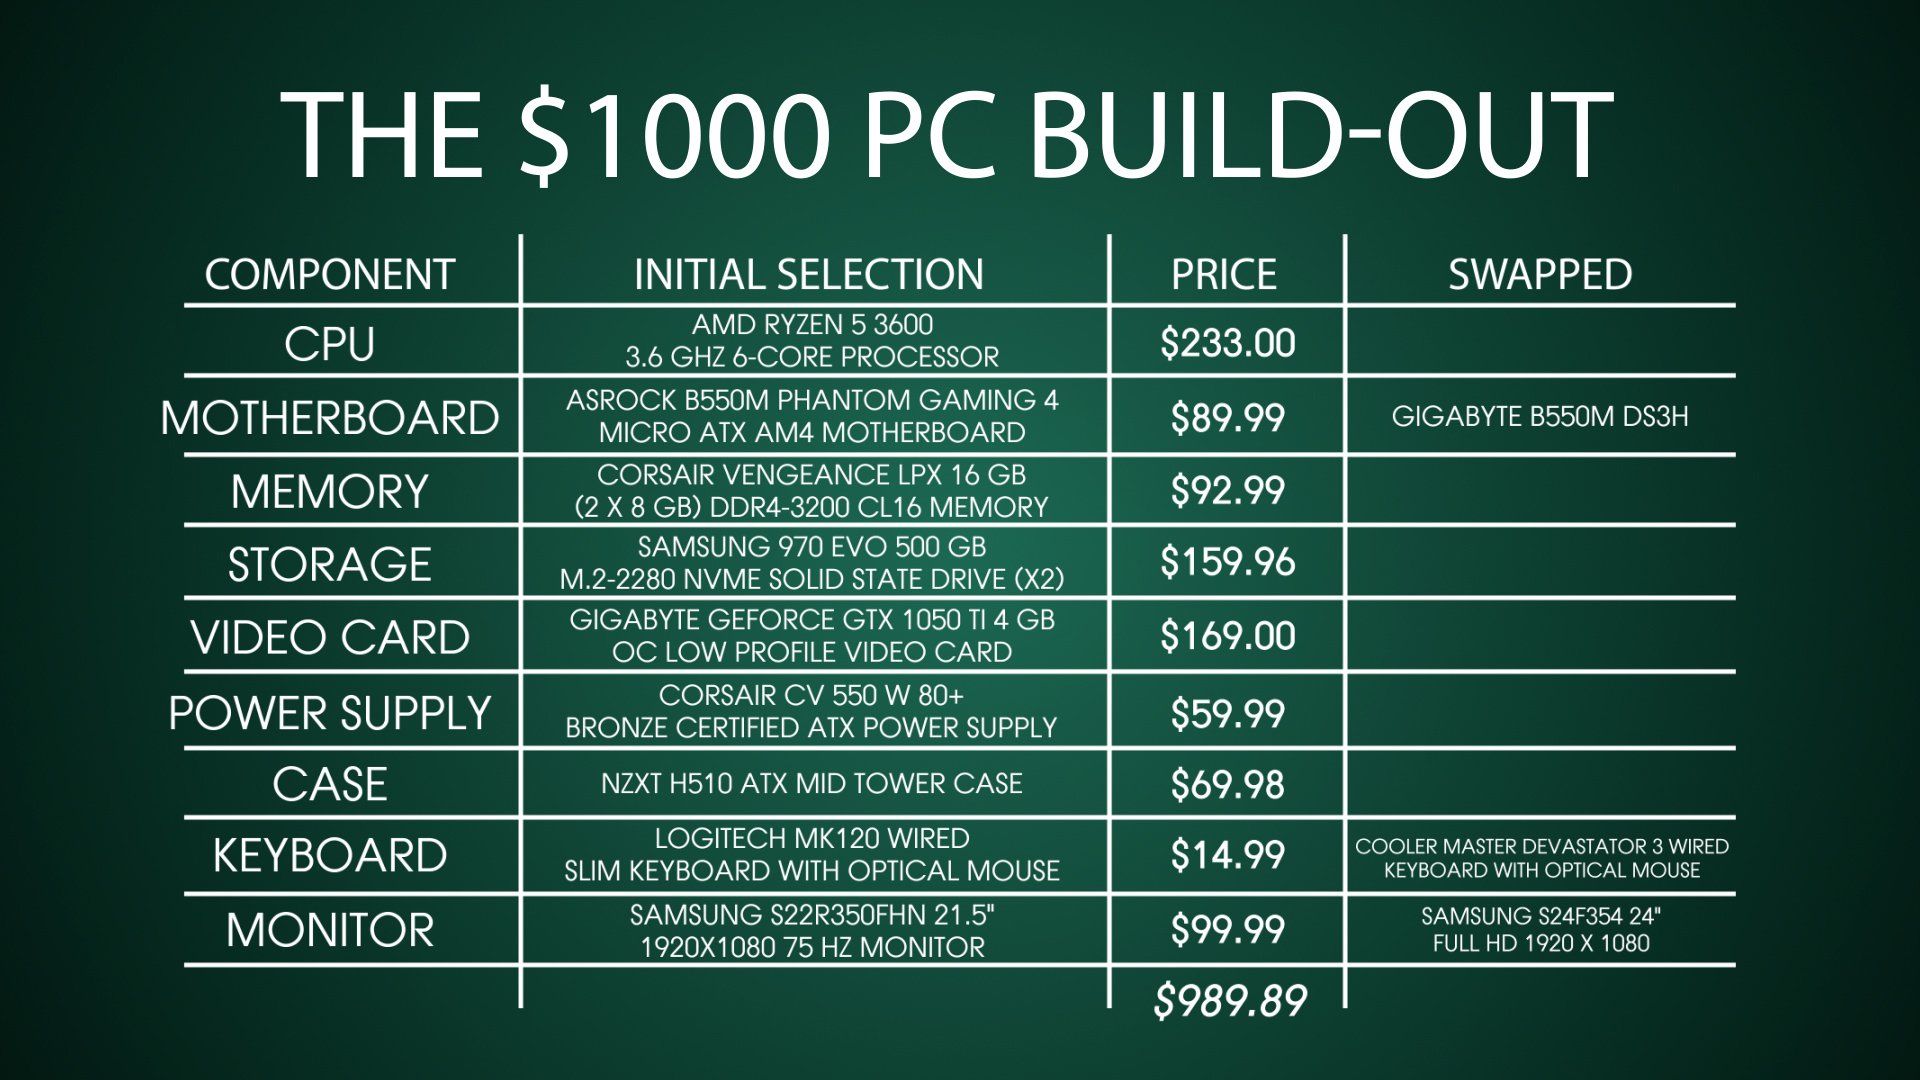
The most important component of any computer is the CPU, as this is the number one factor in the performance you’ll experience with your video editing PC. For this build, we went with the AMD RYZEN 5 3600, which is a six core processor.
Next up is the motherboard, where we opted for the GIGABYTE B550M DS3H, which has two M.2 drives. This is crucial to the rest of the necessary components used in this build.
For the memory, we decided on 16 gigabytes across two 8 gigabyte sticks of DDR4 3200 RAM from Corsair. Budget permitting, It’s recommended to get at least 16 gigabytes as the more RAM a computer has, the better its overall performance.
For storage, this build features a two drive system including two Samsung 970 EVO 500 gigabyte M.2 drives. These drives are both insanely fast and budget-friendly.
The video card is the trickiest component. For a cheaper option, you can go with an AMD card. However, if an Nvidia card is available and within your budget, it's highly recommended as it performs better in Adobe programs. This build utilizes the GTX 1050 Ti, with four gigabytes of Vram.
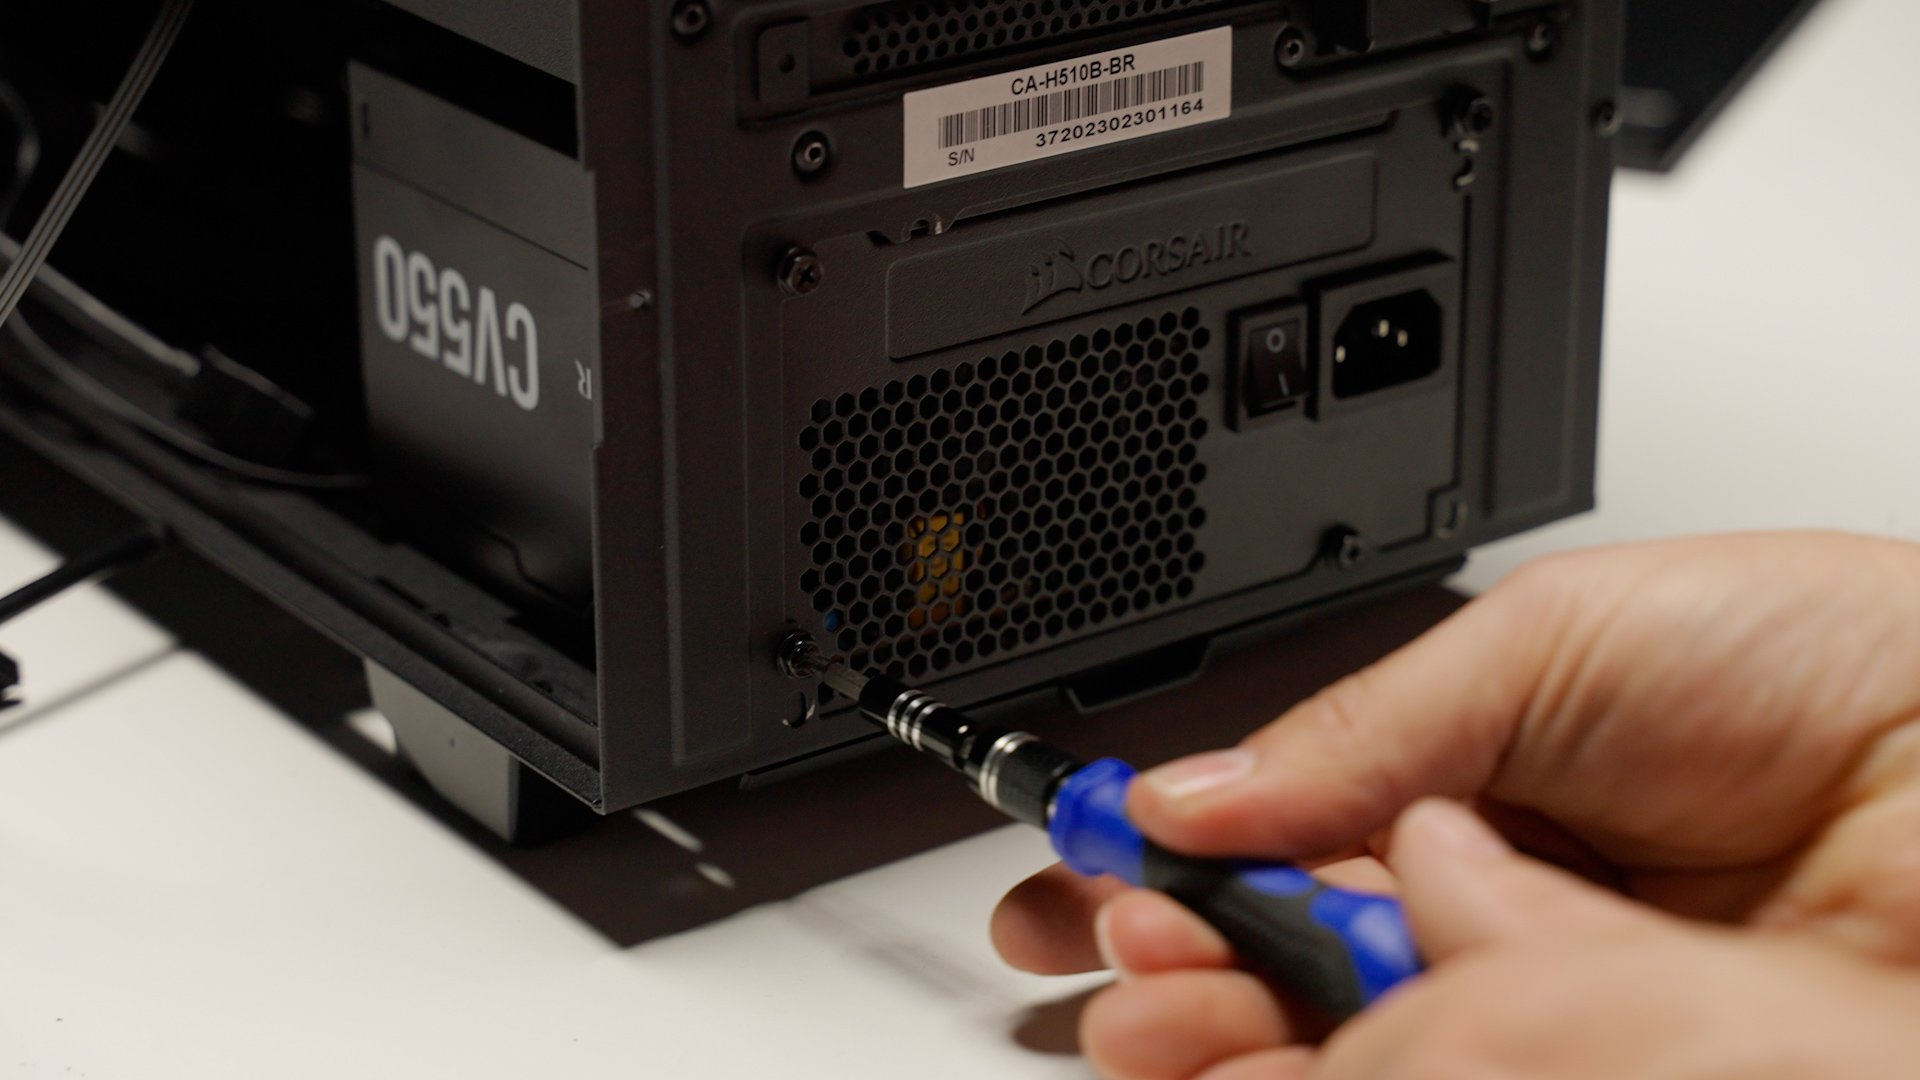
For the power supply, we went with a Corsair CV 550. This is a 550 watt power supply, which is more than enough for this build. It’s recommended to get one of the 80 plus bronze certified or better, as they're going to be more efficient and more reliable.
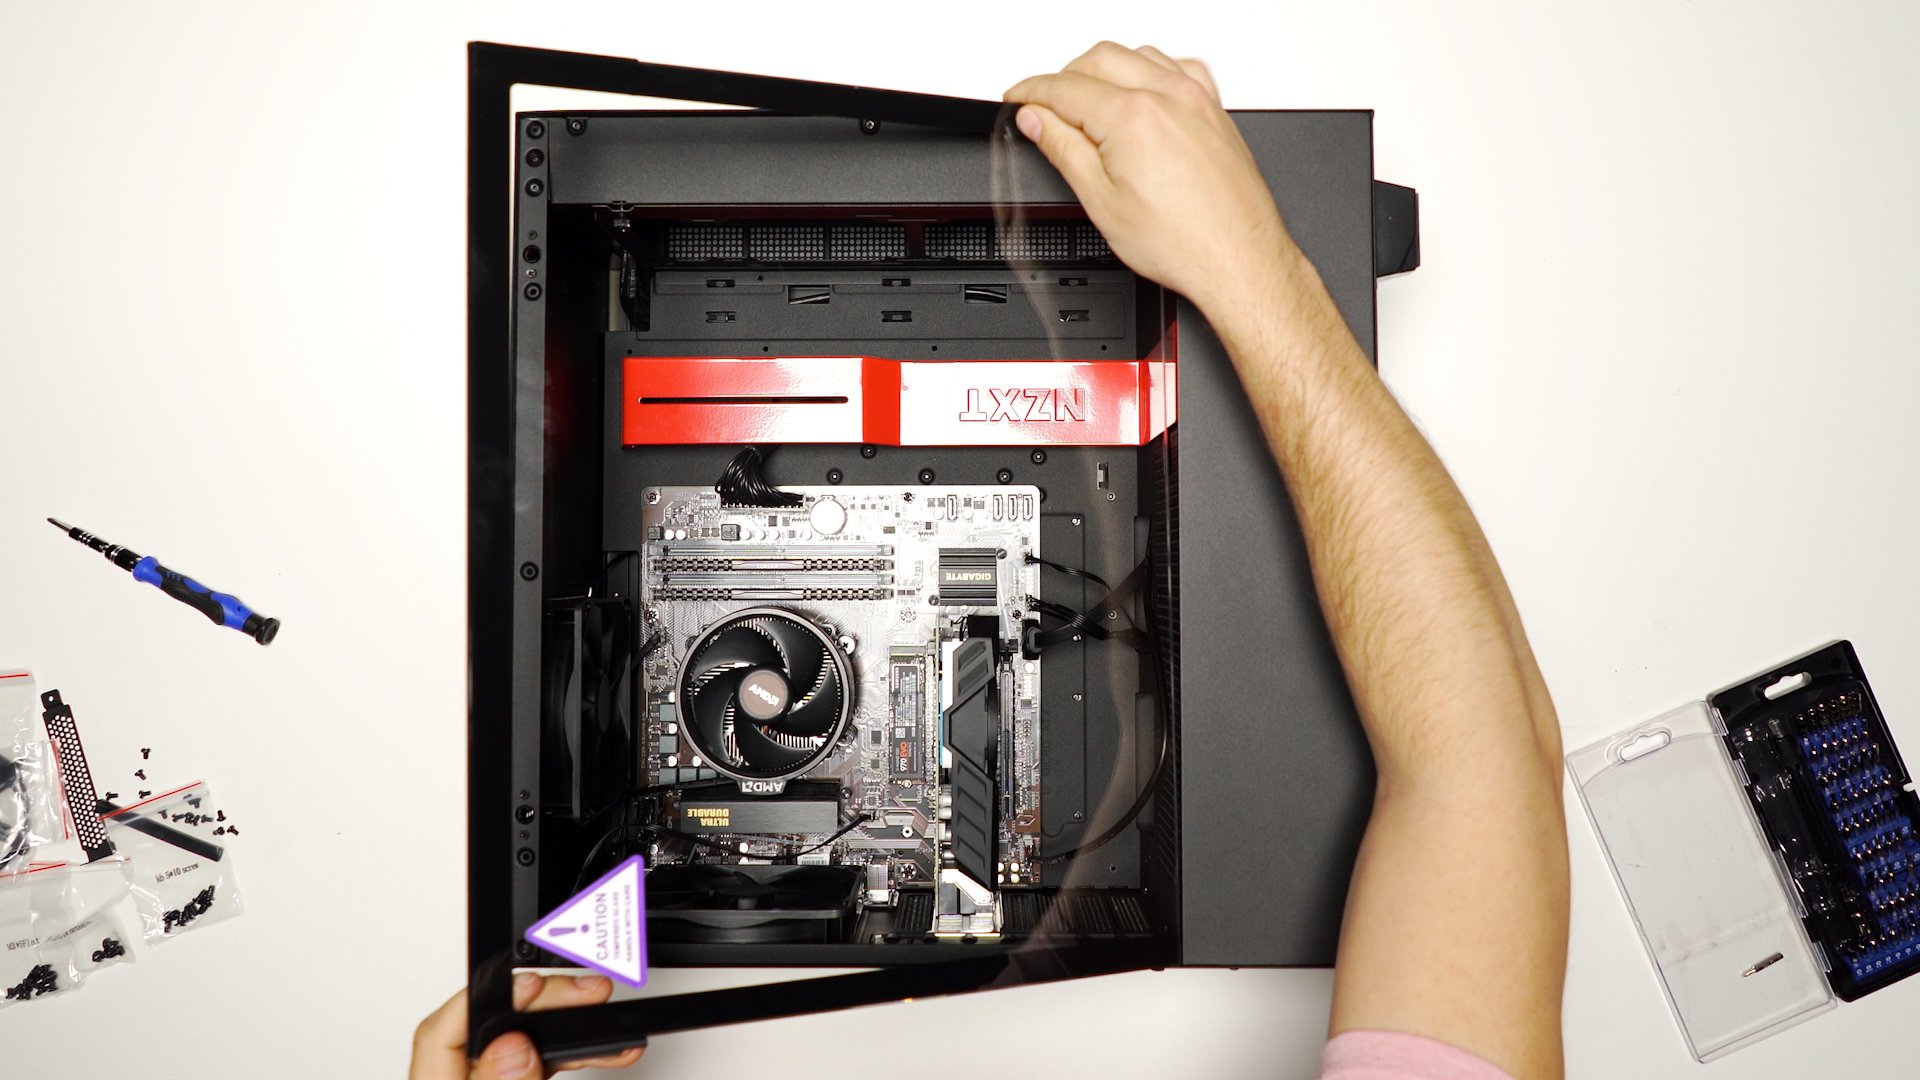
For this computer’s case, we opted for the H510 from NZXT as it is an overall great case for the price.
To keep things super affordable, opt for a wired keyboard and mouse. We went with a Cooler Master Devastator 3 because there was a deal on it, however the Logitech MK120 is also a great combination option as it comes with the keyboard and the mouse.
Finally, in order to stay within the $1000 budget, we went with a 22 inch Samsung 1080p monitor.
At the time of purchase, the grand total for all of these components came to $989.89, which is just under the thousand dollar threshold. Keep in mind, companies often run deals around holidays and promotional codes can be your best friend when buying on a budget.
Now let’s get to building.
The first step begins with the motherboard. When taking it out of its packaging, feel free to leave it on the anti-static packaging to help protect it during the build.

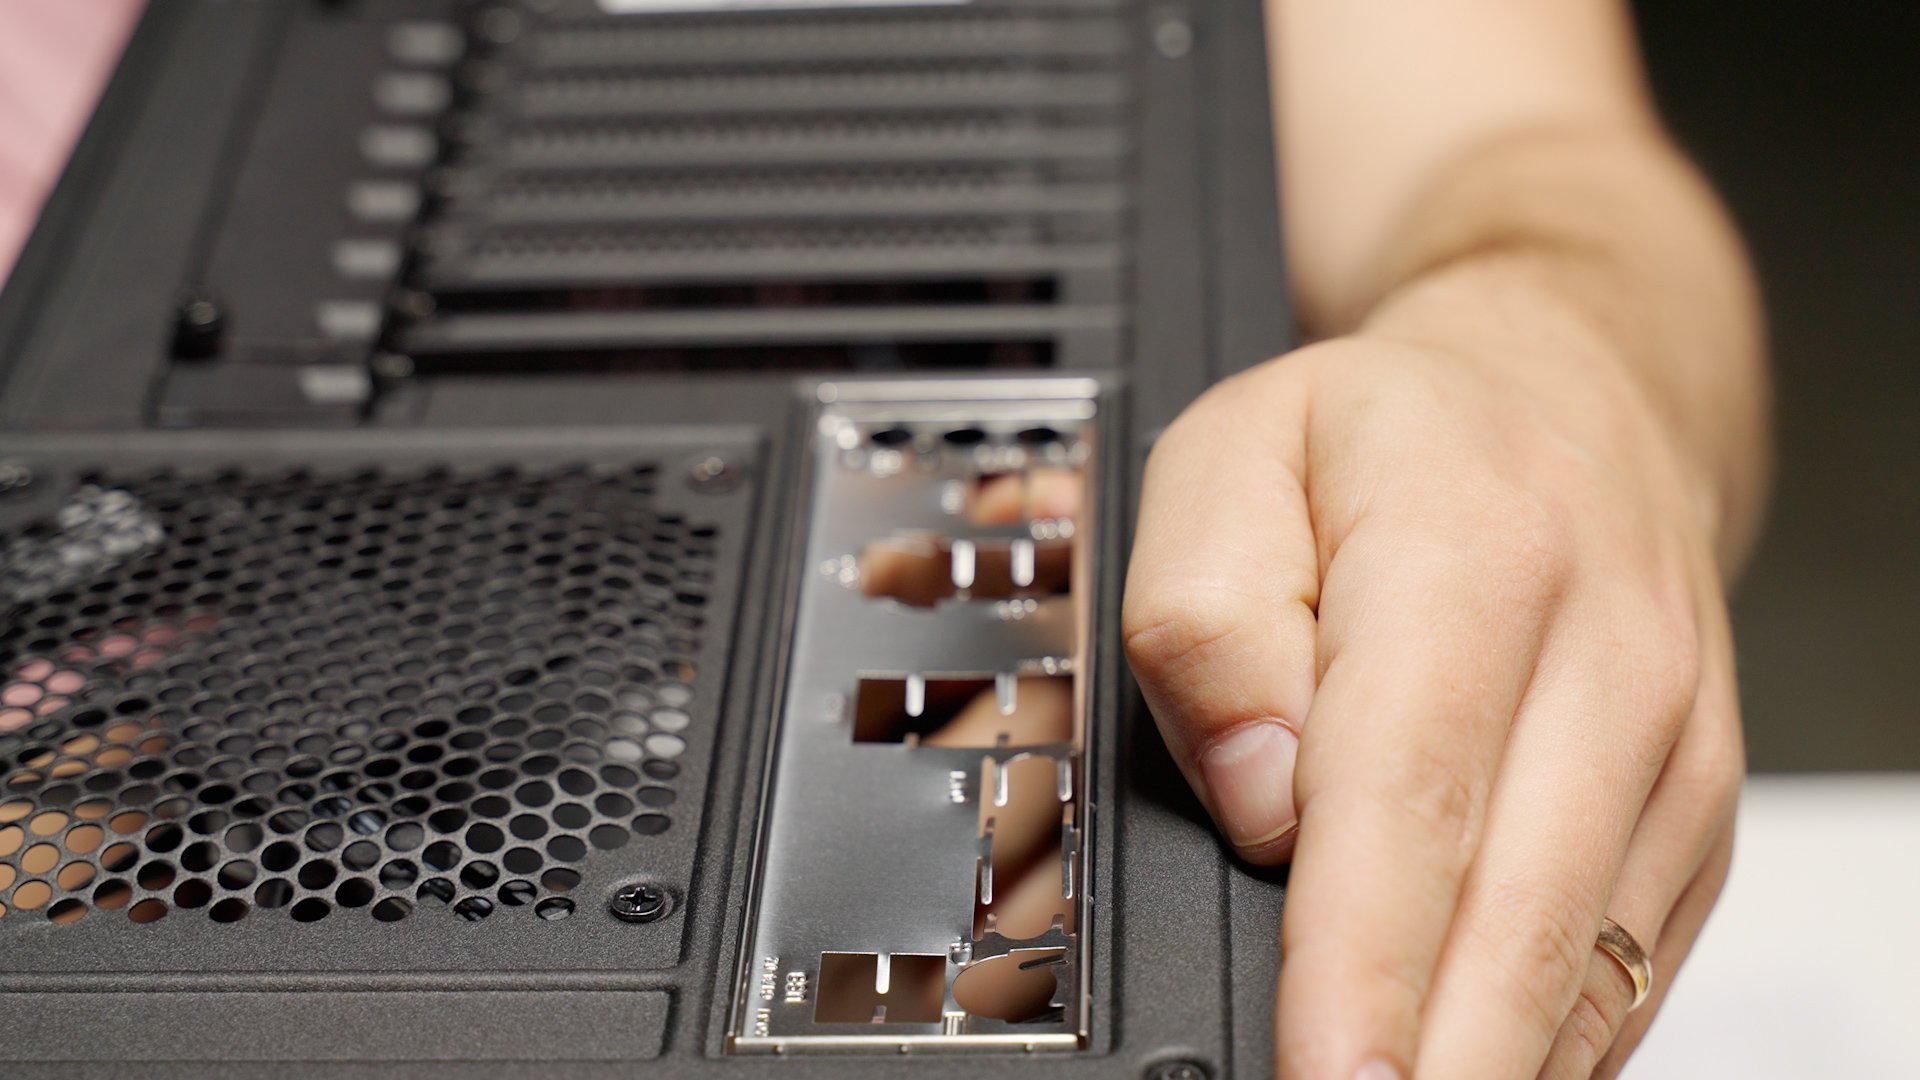
Next, take the glass panel off of the case to begin working inside.
Once the glass shield has been removed, install the IO shield. After making sure the shield is lined up correctly, install it from the inside of the case. If done correctly, it should pop right into place.
Next up, install the processor, making sure it sits in nicely and establishes a connection. Note - if utilizing a used CPU, make sure to clean off any thermal paste.

After the processor is installed, take off the brackets, as shown in the video, to install the CPU fan. The cooler used in this build comes stock with the CPU, but higher-end CPUs typically don’t come with a cooler, so you’ll need to buy one aftermarket. Screw the CPU in utilizing a crisscross pattern in order to ensure it seats evenly. Take the entire unit and place it into the case, making sure all the holes line up with each of the standoffs.

When installing the two eight gigabyte sticks of ram, place them in the first and third slots on the motherboard. Begin by opening up the tabs, as shown in the video, and press firmly until the tabs grab onto the ram and it clicks in place. Make sure to line up the notch in the ram with the notch on the motherboard connection. The other two slots are available for future upgrades.

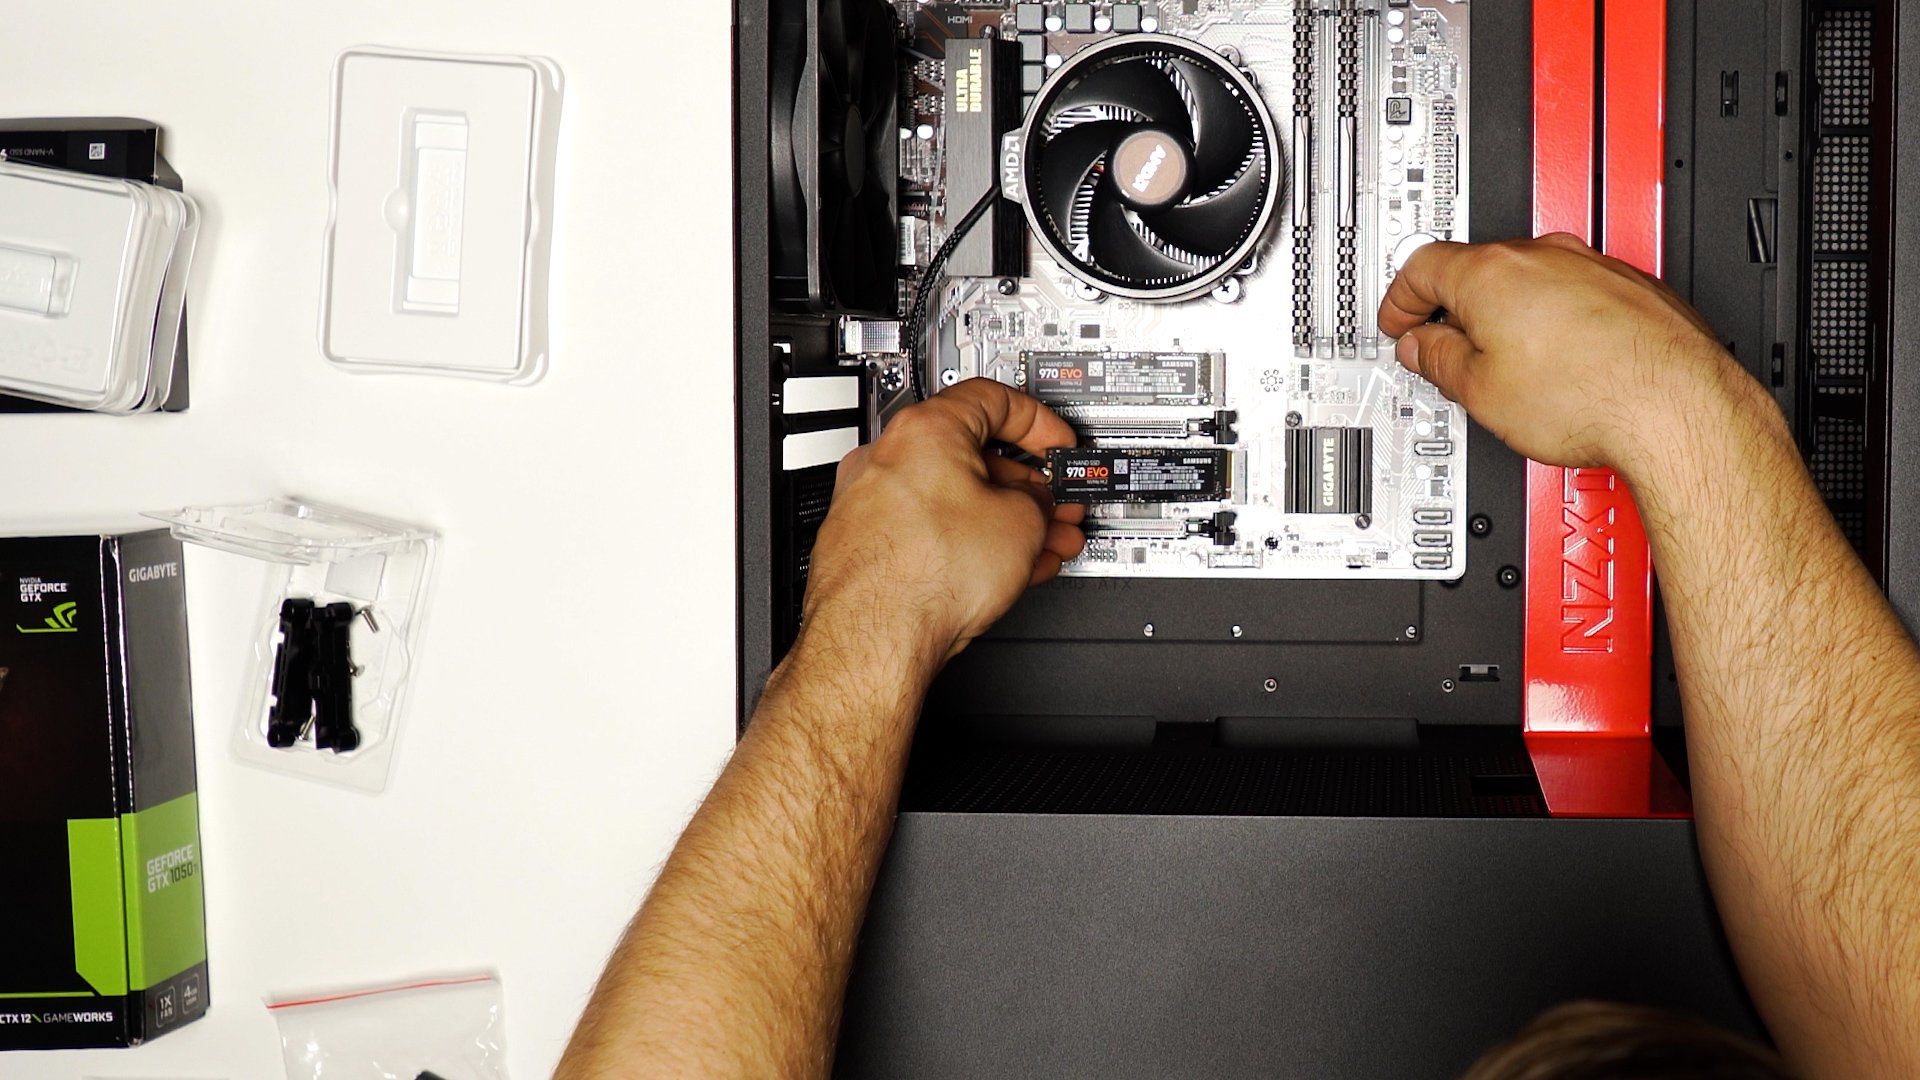
The motherboard used in this build has slots for two M.2 drives. The first one is located above the first PCI express port. Make sure to install the drive at an angle and secure it with a screw. The screw is usually mounted in the board to begin with, so simply take it out when installing the drives. The second slot is located between the two PCI express ports. After sliding both M.2 drives all the way in, tighten each down with a screw.
The graphics card is installed into the PCI express port towards the bottom of the motherboard. While this board has two port options, make sure to use the one in between the two M.2 drives. Because the connections line up with the second and third slots. remove those from the motherboard.
When installing the graphics card, look through the back and make sure the metal tab from the graphics card is getting past the motherboard. This will allow you to slide it down into place so it both fits into the slot and lines up with those two slots for the various connections to the graphics card. Slide the clamp down to hold everything down and fully secure it using screws from the case.

In order to work on the power supply, flip the entire case over. Take the back panel off and place the Corsair CV 550 in the bottom of the case. Move any wires out of the way and install the power supply down into the case. After the power supply is placed, take the case and turn it upright so that the screws will line up with the case. Next, screw everything in and tighten the power supply down.
When connecting the main power supply, feed it through the channels, as shown in the video, in order to keep the cables nice and organized. Because the connection for this is on the side of the board, the best place to feed the cables is through the front.

For the cpu power supply, use the channel shown in the video to feed it through the top of the board. Use a twist tie to secure it into place.

The front panel connectors are located on the bottom of the motherboard, so make sure to feed them through the bottom hole of the case. If there are any extra wires, simply place them in the empty space at the bottom of the case to keep them secure and out of the way.

Once everything is secured, put the back panel cover back on the case and screw each side down. To make the final power connections, flip the entire case over.
Beginning with the main power connector, observe the shapes of the different connectors and match them up to their respective ports on the motherboard. Plug the power connector in until it clicks into place.

The next component that requires power is the processor, which was fed up through the top of the case. Place the processor in the top left hand corner of the case and push it down until you hear a click.

When connecting the front panel connections, begin by connecting the USB 3, which is the cord with the blue end. Simply plug the USB 3 to its corresponding port on the motherboard.

For the front panel connections for the power switch and LEDS, plug them in using the jumper shown in the video. In order to get all the proper connections made on the motherboard, ensure you line up the positive and negative terminals.
The next step involves plugging in all the fans. Because there are different case fan ports available, simply choose the one that is closest to the fan. For this build, there are two case fans with at least two case fan ports. Route the fans wherever it is most convenient for your purposes. Connect the CPU fan to its specific port located near the ram slots and tuck its cord back so it doesn't get in the way of operating the fans.

The final step is to simply place the glass panel back on the case. Hook the tower up to your monitor, mouse and keyboard. Now it’s time to click that power button!
If everything has been set up correctly, your computer should turn on and boot into the BIOS. Remember, you’ll also need to purchase an operating system for your computer. There are free versions of Windows that can be downloaded without the full breadth of capabilities, but an average Windows subscription will cost around $130.

Investing in a solid, reliable editing PC is absolutely essential to a good workflow, and opting for building your own will allow you to upgrade components over time and customize a computer to your specific needs.